Thinking About DIY Rug Tufting at Home? Here’s What You’ll Need
If you’ve fallen in love with rug tufting and you’re wondering whether to try it at home, here’s an honest starting point — what the craft actually requires, what tends to trip people up, and why most people find a guided studio session is the better place to start before investing in their own setup.
What You’d Need for DIY Tufting at Home
Home tufting requires a specific set of tools and materials, and understanding what each one does helps you make better decisions if you do decide to buy your own setup.

The Tufting Gun
This is the core tool — a motorized device that pushes yarn through fabric to create the pile of your rug. Guns generally fall into a few categories:
- Cut-pile guns, which cut the yarn as it’s punched through, creating soft, upright strands
- Loop-pile guns, which leave the yarn uncut, creating a smoother, looped texture
- Dual/duo guns, which can switch between both styles
Beginners typically start with a cut-pile gun, since it’s more forgiving and produces the plush, textured look most people associate with tufted rugs.
Monk’s Cloth
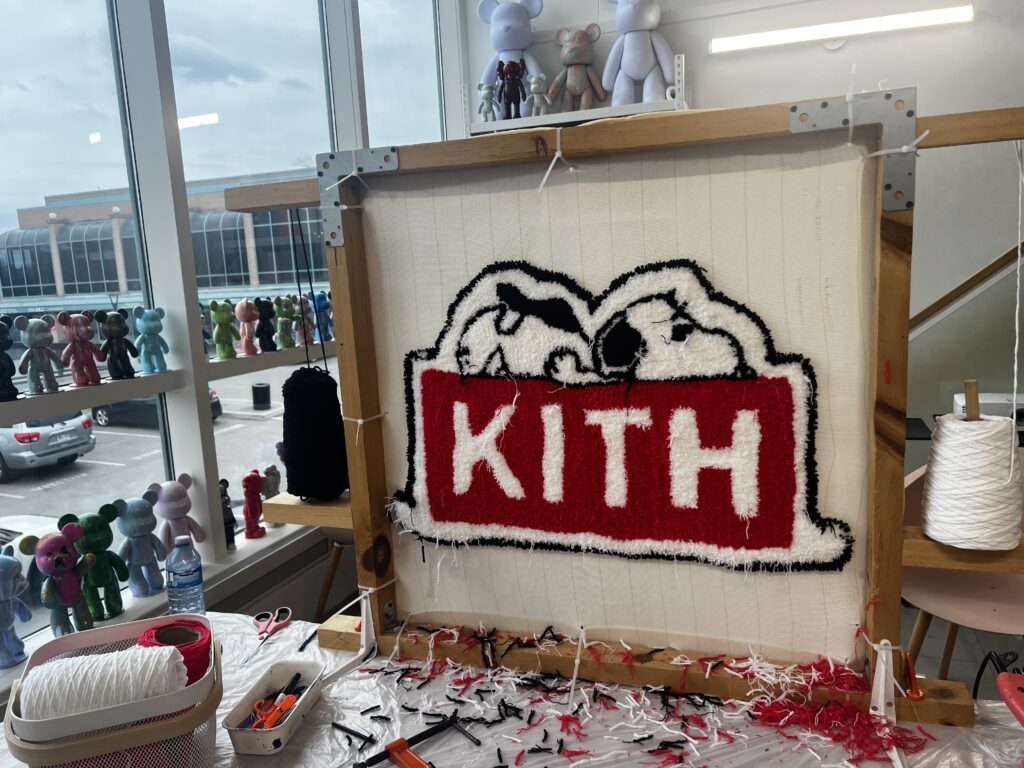
This is the backing fabric your design is tufted into — a loosely woven cotton canvas with a visible grid pattern that helps guide straight lines and consistent spacing. It needs to be stretched drum-tight across a frame before you start; loose or unevenly stretched cloth is one of the most common causes of uneven, sloppy-looking results for first-time home tufters.
A Frame
The frame holds your monk’s cloth taut while you work. Frames range from simple wooden builds to adjustable metal versions that can accommodate different project sizes. If you’re building your own frame rather than buying one, getting the tension right (and keeping it consistent as you work around the whole piece) takes some trial and error.
Yarn
Acrylic yarn is the most common and affordable choice for beginners — it’s widely available, comes in a huge range of colours, and holds up well to regular use. Wool is a step up in cost and offers a softer, more premium feel, but is less forgiving to work with for a first project. Yarn weight (thickness) also affects your results — thicker yarn creates a bolder, chunkier texture, while thinner yarn allows more detail but takes longer to fill in.
Finishing Materials
Once tufting is done, you’ll need:
- Latex or fabric glue, applied to the back of the piece to lock the yarn in place
- A secondary backing fabric, glued over the adhesive to protect and seal the back
- Trimming shears, to clean up any uneven yarn and give a smooth, even finish
This finishing stage is what turns tufted yarn held in place by tension into an actual durable rug you can walk on or hang — skipping or rushing it is one of the most common reasons home-tufted pieces fall apart faster than expected.
What Actually Trips Up First-Time Home Tufters
If you’re set on trying this at home, a few honest heads-ups based on common beginner mistakes:
Uneven fabric tension. If your monk’s cloth isn’t stretched evenly and tightly, your design can warp or pucker as you work — and it’s hard to fix once you’ve started tufting.
Rushing the finishing step. Gluing and backing properly takes time to dry and set correctly. A rug that’s used before the glue has fully cured is much more likely to shed yarn or come apart at the edges.
Underestimating time. A modestly sized piece can take significantly longer than expected once you factor in design tracing, the actual tufting, and finishing — first attempts in particular tend to run long as you get a feel for gun speed and pressure.
Gun control and pile consistency. Keeping a consistent pile height and gun angle across an entire design takes practice. It’s very common for a first piece to look noticeably different in texture between sections tufted early versus later in the session, once your technique has settled in.
Underinvesting in a frame. A wobbly or improvised frame makes every other part of the process harder — cloth tension is much more difficult to maintain and adjust with a frame that isn’t sturdy or properly adjustable.
None of these are reasons not to try tufting — they’re just the reality of learning any hands-on craft without guidance. Most of them are also exactly the kind of thing an instructor catches and corrects in real time, which is the core advantage of learning in a class first.
DIY at Home vs. a Guided Studio Session
There’s no single right answer here — it depends on what you’re actually trying to get out of it.
DIY at home makes sense if:
- You want ongoing access to make multiple pieces over time
- You’re comfortable troubleshooting technique through trial and error
- You have space to dedicate to a semi-permanent setup
A guided class makes more sense if:
- This is your first time trying tufting and you want to see if you enjoy it before investing in equipment
- You want a properly finished, durable piece without the learning curve
- You’d rather spend a few hours creating than research and assemble your own toolkit
- You’re doing it as a one-off — a date, a gift experience, a group outing — rather than starting an ongoing hobby
Realistically, a full home setup (gun, frame, cloth, yarn, glue, and tools) represents a real upfront cost before you’ve made anything — and pricing varies significantly by retailer and quality tier, so it’s worth researching current prices directly with suppliers rather than trusting a fixed number, since equipment costs shift over time. A guided class, by comparison, has one clear, all-inclusive price and gets you a finished piece the same day.
Why Most Beginners Start With a Guided Class
Learning tufting entirely on your own means troubleshooting fabric tension, gun technique, and finishing without any real-time feedback — which usually means a slower learning curve and a higher chance that your first piece doesn’t hold together as well as you’d hoped.
A guided workshop solves this by giving you:
- Professional-grade equipment already set up and properly tensioned, ready to go
- Real-time instructor feedback as you work, catching mistakes before they become part of the finished piece
- Proper technique from the start — pile height, gun angle, and finishing done correctly the first time
- A completed, durable piece by the end of the session, rather than a work-in-progress you have to finish (and troubleshoot) alone
Many people who eventually do build a home setup started by taking a class first — it’s a much faster way to learn what actually matters before spending money on your own equipment, and it tells you honestly whether you enjoy the process enough to invest further.
Try It at ZuoZuo Studio First
Before you commit to a home setup, come tuft a piece with us — you’ll get hands-on experience with professional equipment, real instructor guidance, and a finished piece to take home, all without buying anything yourself first.
| Size | Dimensions | Price |
|---|---|---|
| Small | 50×50cm | $110 |
| Medium | 70×70cm | $138 |
| Large | 90×90cm | $178 |
| X-Large | 100×120cm | $210 |
Every session includes the tufting frame with monk’s cloth already stretched, your full yarn selection, use of a professional tufting gun, complete instructor guidance, and finishing (gluing and trimming) handled for you.
A genuine 4.9-star rating from 256+ Google reviews — see what our guests are saying
“Had an amazing tufting experience here. The owners were very nice and accommodating to our schedules even on the holidays. Would recommend any beginner / group tufting activity to be done here in the GTA!” — Katina, Local Guide, 125 reviews
📍 1315 Lawrence Ave E, Unit 406, North York, ON M3A 3R3 📞 226-348-4177 🕐 Thursday to Sunday, 12pm–8pm
Is it cheaper to tuft at home than take a class?
Not necessarily, once you account for the full cost of equipment. A guided class typically works out to a comparable or better value for a first piece, since materials, tools, and instruction are all included in one price.
Do I need experience before trying tufting at home?
No, but most people find it much easier to learn proper technique in a guided setting first, then apply that knowledge if they set up at home later.
Ready to Try It the Easy Way First?
Skip the research, the equipment shopping, and the trial and error — book a guided session and walk away with a real, finished piece the same day.
Book a session at ZuoZuo Studio
📍 1315 Lawrence Ave E, Unit 406, North York, ON M3A 3R3 📞 226-348-4177 🕐 Thursday to Sunday, 12pm–8pm ⭐ 4.9/5 from 256+ Google reviews